Enhance your platform's security and user experience by integrating Google Authentication. Follow these detailed steps to obtain your Google Client ID and Secret, activate the feature from the admin panel, and observe the seamless changes.
Step 1: Obtain Google Client ID and Secret
To start, you need to create a project in the Google Cloud Console to obtain your Client ID and Secret.
- Visit the Google Cloud Console and sign in with your Google account.
- Click on the project drop-down and select "New Project".
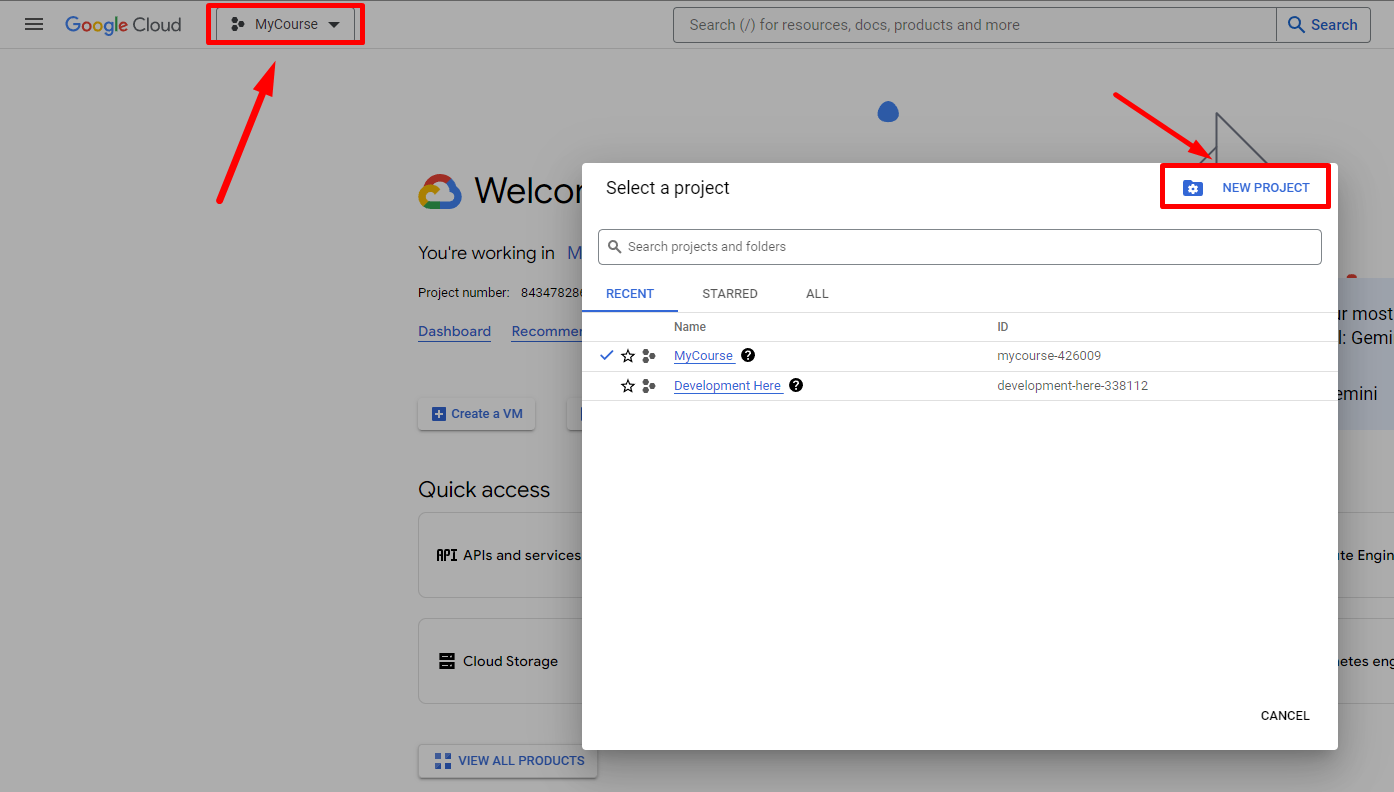
- Name your project and click "Create".
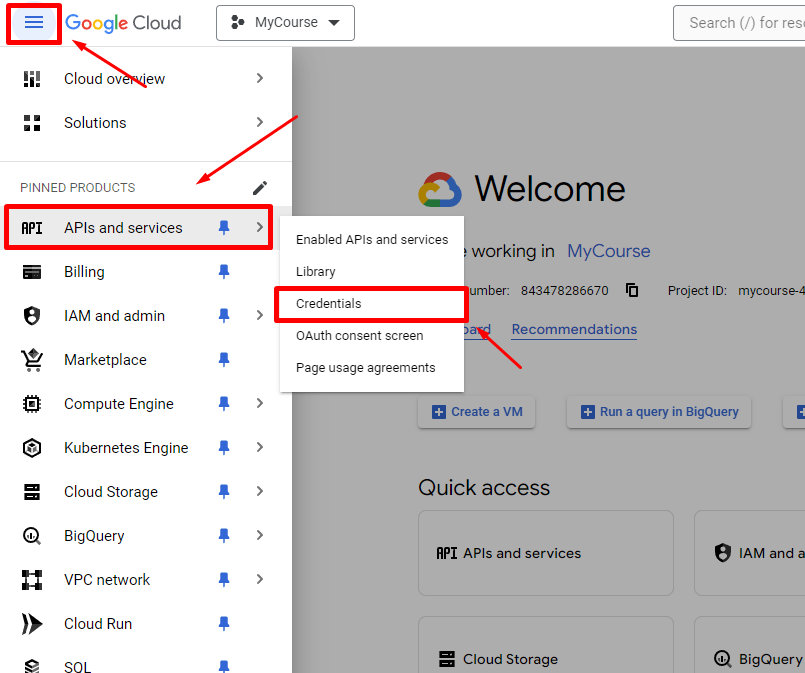
- Navigate to the API & Services section and select Credentials.
- Click on Create Credentials and select OAuth 2.0 Client IDs.
- Fill in the required fields and click Create.
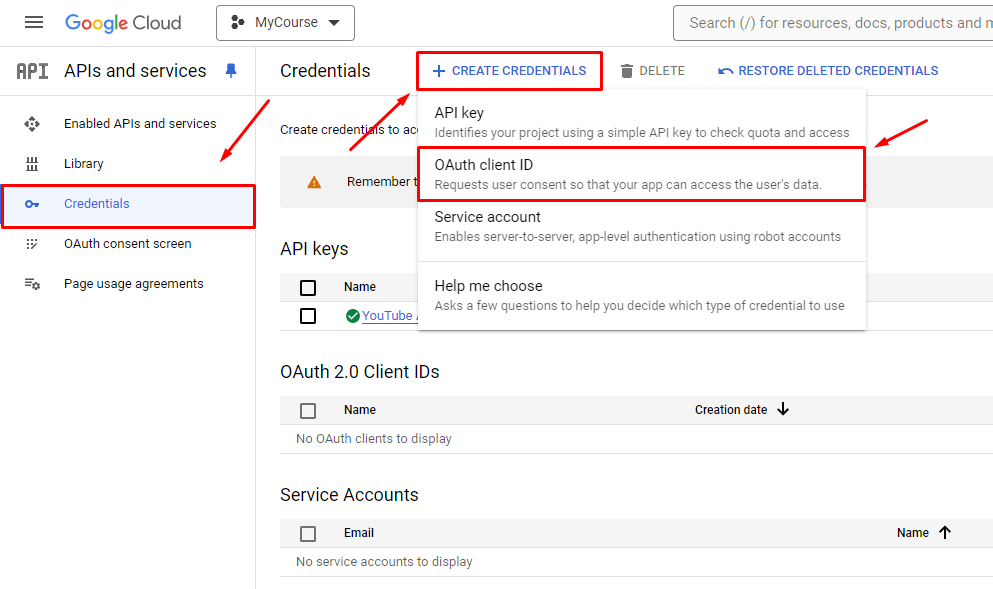
- Your Client ID and Secret will be generated. Copy these for later use.
1.1 Add your Authorized Redirect URI
Immediately after you choose OAuth 2.0 Client ID (Web application) in the Google Cloud Console and before you click Create, scroll down to the Authorized redirect URIs section:
- Click + Add URI
- Paste in your callback URL, for example: https://you-subdomain.my-course.co/auth/google/callback
- Make sure it matches exactly (including
https://, subdomain, path, and trailing slash if any). - Then click Create (or Save if you’re editing an existing client).
Step 2: Activate Google Authentication from the Admin Panel
After obtaining your Google Client ID and Secret, the next step is to activate the Google Authentication feature from your admin panel.
- Log in to your admin panel by clicking on the "Admin Panel" icon in the main menu.
- Navigate to the Extension Market from the side menu.
- Find and activate the Google Authentication extension.
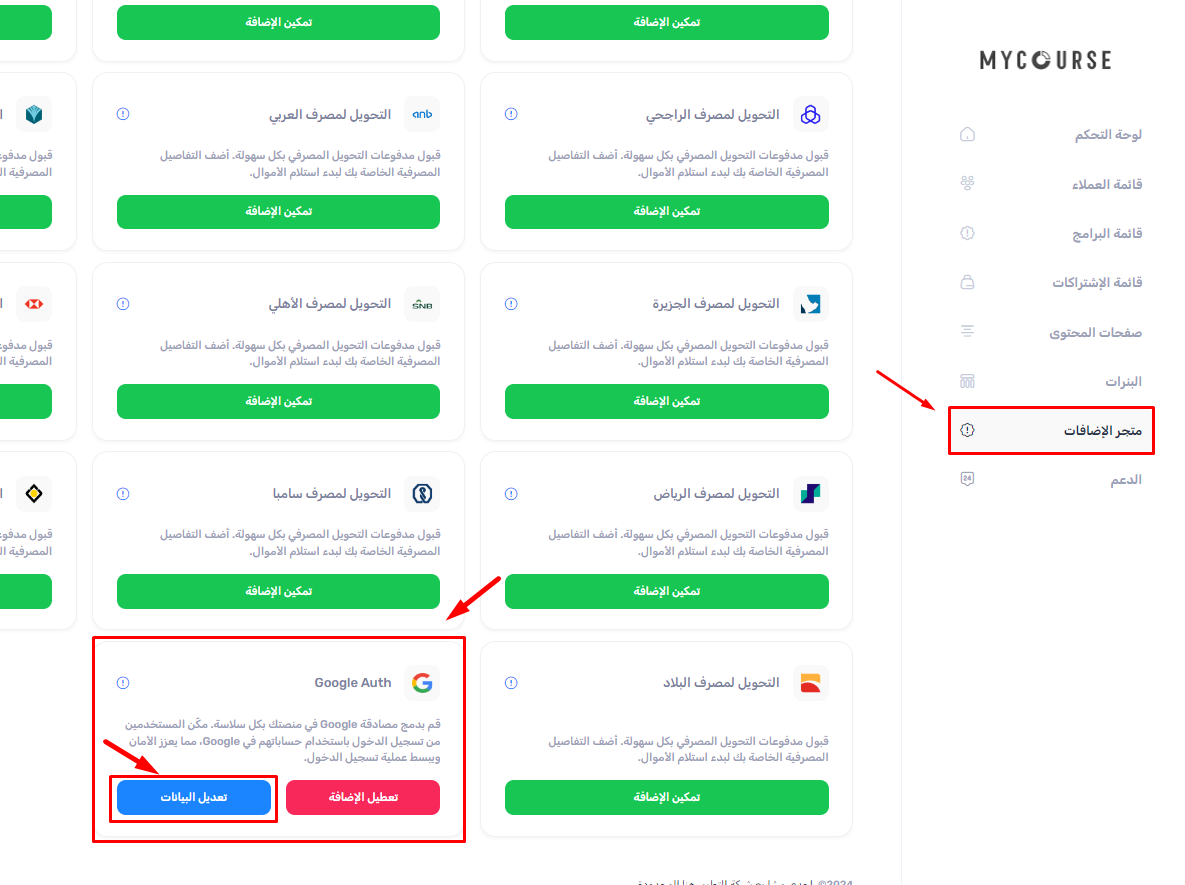
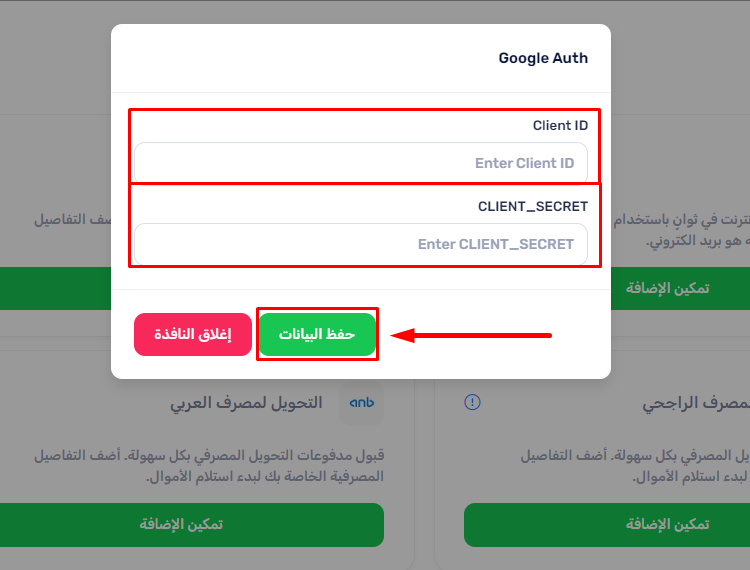
- Edit the extension and fill in the Google Client ID and Secret you obtained earlier.
- Click Save to apply the changes.
Step 3: Monitor the Changes
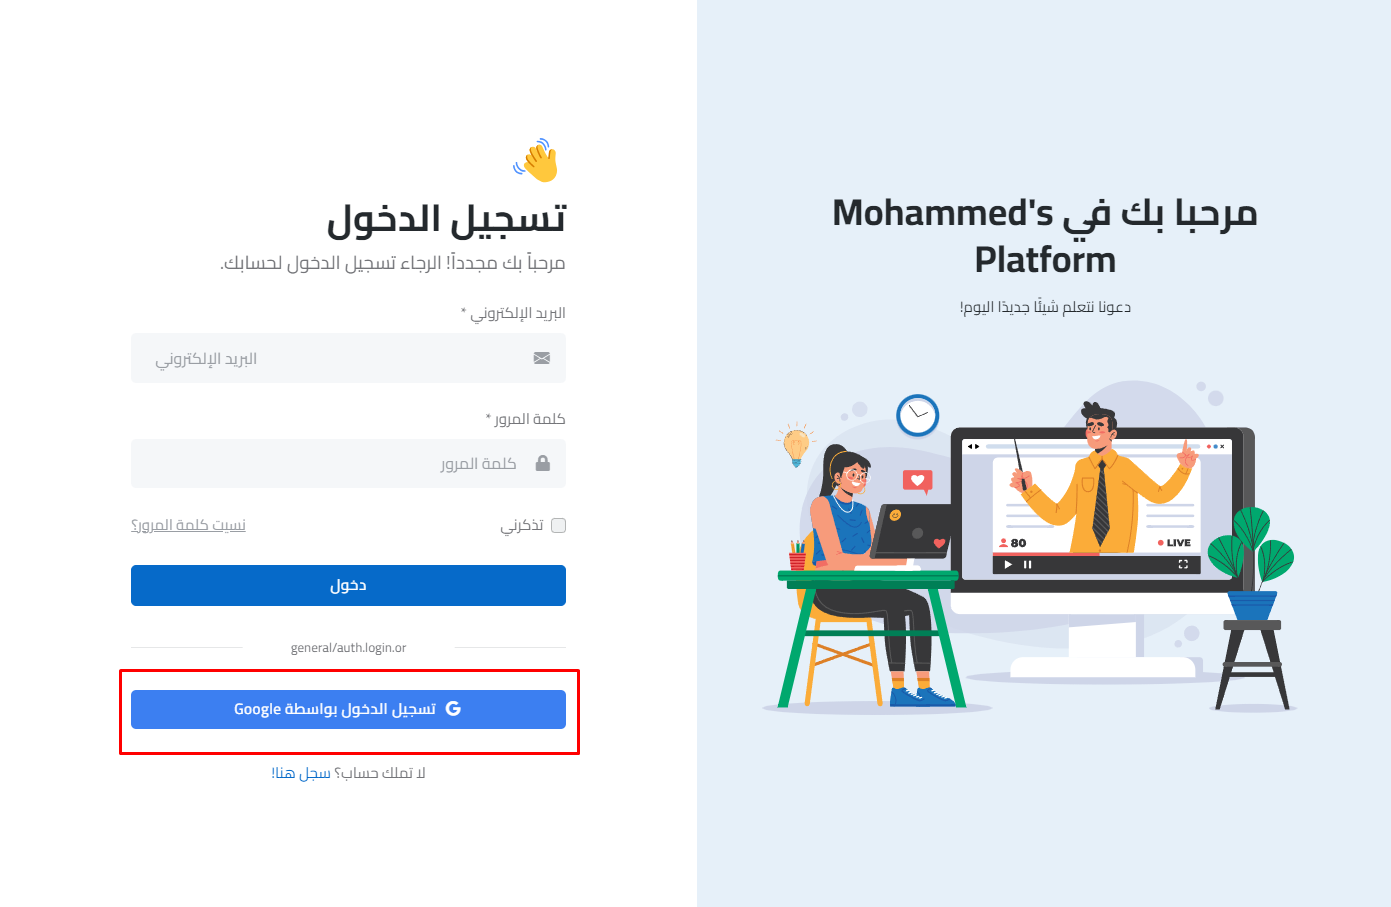
Once you have activated and configured Google Authentication, your users will see the option to log in using their Google account. This enhances the security and convenience for your users.
- Log out and navigate to the login page to see the new Google Authentication option.
- Test the functionality by logging in with a Google account.
- Ensure the process is smooth and the login is successful.
By following these steps, you can easily integrate Google Authentication into your platform, providing a secure and user-friendly login option for your users. For more information and support, visit our website.